| App | google tv |
| Version | 4.32.62 |
| App uploaded by: | Rohan Kumar |
| Requirements: | Android 6.0+ |
| size | 27.4 MB |
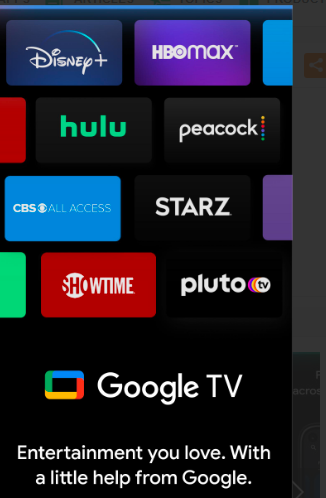
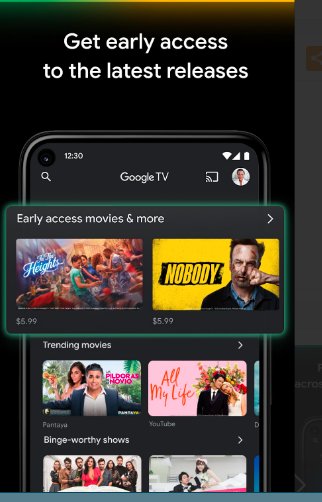
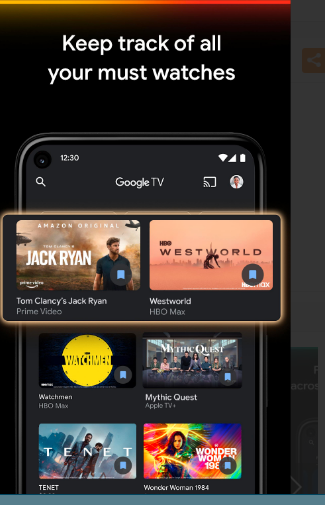
In addition to other than the Pixel 5 and Pixel 4a 5G models, the web boss Google has also revealed an entirely new Chromecast after a few years. This time, the Chromecast comes with its own interface for TV dubbed Google TV which is a slightly upgraded UI over that of the standard Android TV OS. The updated design of the device and the simple user interface of Google TV make a better combination to find the content you require all in one spot. If you’ve been waiting to try this Google TV UI, then you’ve come to the right place. We’ve provided a simple step-by-step procedure on how to install Google TV on Any Android TV.
It’s important to note that Google TV’s interface is accessible from any Android TV device, including Mi Box, Nvidia Shield as well as Sony TVs, and many more. Check the Android TV must be running Android 9.0 Pie or better. While Google TV with the new Chromecast is being launched in the US for a limited time it will be able to use it to stream content anywhere in the world by using VPN. VPN service.
You’ll need APK documents, and ADB commands via a computer in order to switch off Google TV’s Google TV user interface completely. We’ll discuss that aspect later, as using VPN services VPN service is as simple as using any other application for your mobile or computer device.
How to Install Google TV on Any Android TV
To begin with, make sure you check for Android TV OS information from your Android TV’s Settings> Preferences for Devices > About > Version. If you find that your Android TV is running with Android Pie or above, you’re all set. So, without any further, let’s dive into the following guide.
Be aware that some Android TV makers have an integrated File Manager application that can be used to perform the search of files, transfer them, or install them. Therefore, in this case, there is no require installing an additional file manager app for Android TV.
Installation / Sideloading Steps:
Step 1.
Make sure to download both the Google TV APK and Google Apps for Android TV APK files to the back of your Android smartphone. If you’ve downloaded both APK files using Windows/Mac/USB flash Drive, then follow the steps to sideload below, then begin following step 8 again. step.
Step 2.
Now, install the Solid Explorer File Manager application on your Android TV using the link from the Google Play Store directly.
Step 3.
Then head over to the Android TV Settings menu Settings > Security & Restrictions > Not-known Sources Make sure to turn on The Solid Explorer app. (Important)
Step 4.
Now, transfer or share both APK files you downloaded. APK files to your Android TV.
- In order to do that, you must launch your Google Play Store app on both the Android TV as well as the Android smartphone. (Keep your eyes on the two devices and remember that devices must be connected to the same Wi-Fi connection.)
- Now, install the Send Files to the TV app on both devices.
- Once you’ve finished, open the app on both devices. Next, you need to tap the Receive button on your Android TV.
- Click on Send on your mobile device > Select both APK files.
- On the next screen, you’ll be able to see the Android TV’s information. Just tap it to confirm that you’re sending APK files.
- In just a few seconds your files are uploaded in a matter of seconds to Android TV.
The 5th step.
Now, launch the Solid Explorer File Manager app on Android TV. Then, go to the downloads directory.
Step 6.
Select the APK file in order and select Install through the Package Installer exactly like how the way we set up APKs on Android smartphones.
step 7.
Once installed on both the Google App and Google TV apps, you’ll see them listed in the Apps section on Android TV. Android TV.
Step 8.
Now, launch the Google Play Store on your Android TV. Then, install the app “Home Screen Launcher on Android TV’ by clicking the download link provided above.
9. Open the Home Screen Launcher for the Android TV application on your Android TV. It will recognize it as the LauncherX (Google TV) app that’s present on Android TV.
10.
Just open the LauncherX or YouTube UI.
Step 11.
Boom! You’re done. It’s been installed successfully. Google TV UI on any of your Android TVs.
step 12
. Just restart your Android TV once and begin exploring and streaming content effortlessly. Make sure to click your Home button (Home Screen Launcher for the Android TV application) each time you turn on your TV to launch an interface for Google TV. It’s obvious because the launcher type of thing is important to open the Home icon every time you turn on your TV.
Transfer and Install APK Files on Android TV via Windows PC
- If you’ve already downloaded APK files to your PC or laptop running Windows, you’ll have to install and download this application. “Send Files To” TV application on your personal computer.
- Once the application is installed, visit The System Tray of the Taskbar and then right-click on the application.
- Go to Send Files. Remember that both the PC as well as the Android TV need to be connected to the same Wi-Fi network.
- Select both APK files. Then, in the new window, the Android TV will appear.
- Click on the TV’s name to select it, then click OK.
- Both documents will transfer soon. If they are not transferred, test again and make sure that both devices are via the same Wi-Fi, or not.
- After that, launch The Solid Explorer File Manager app on Android TV. Go to the Downloads Folder.
- Choose the APK file one at a time and then select Install through the Package Installer similar to how the way we set up APKs on Android smartphones.
Transfer and install APK Documents onto Android TV with Mac
- As we mentioned earlier that both Android TV, as well as Mac, must connect to the exact Wi-Fi connection in order to transfer or share files effortlessly.
- Now, go to System Preferences on your Mac OS > Select Share.
- Choose the File Sharing option in addition to the remote login to the left side of the pane.
- Choose to Access is granted to all users There’s something similar to SSH @. (Take note of the IP address and username on your Mac)
- Go to Android TV and launch the Solid Explorer File Manager app.
- Hit the hamburger menu to access choices.
- Select the 3-dots symbol (menu) Then, select Storage Manager. Click the plus (plus) icon located on the right side in the lower right corner of the display.
- Select SFTP and then add the FTP server details, such as the IP address that you’ve recorded to
- your Mac. (Make sure you put the IP address in the Remote hostname field.)
- You can leave the other options open and then click Next.
- Then, you’ll need to enter the username of the Mac you’ve previously noted.
- You can also set the same password you use for your Mac login to make it easier to use in the future.
- Click Next. Make sure to leave the remaining options unaffected.
- In the end, the brand new FTP server is installed by your Android TV, under the Storage Manager section.
- Click on this link on the server to start your Mac on the Android TV.
- You can then easily duplicate and paste both APK files onto the Android TV. (File path will be Volume\Date\Users\YourUsername folder)
- Once you’re done, you’re good to go. Once your files are transferred to your Android TV, utilize your Solid Explorer app on the Android TV to install or sideload APK files using The Package Installer.
Transfer and install APK Documents onto Android TV by using USB Flash Drive
- Download both APK files to either your Windows or Mac PC.
- Attach the USB Flash Drive to the computer and transfer both files.
- Unplug your USB Flash Drive and connect it to the Android TV’s USB port.
- Start Solid Explorer on the Android TV > Locate and select both APK files from the USB storage.
- You can download your APK files one at a time onto the Android TV by clicking the APK file and selecting Package Installer for installation easily.
Run Google TV UI on Android TV in any Unsupported Region
In the past, Google has released the most recent Google TV UI featuring the new Chromecast for the USA region, however, other nations may not be able to access all-inclusive streaming capabilities or content choices. However, it’s obvious that once you’ve installed any of the no-cost or paid VPN application services to your Android TV then you’re in good shape.
- Just visit Google Play Store. Google Play Store on your Android TV.
- Look up a VPN application and you will find numerous free VPN services to choose from. But, you have the option to use either the Turbo VPN or Windscribe VPN application for Android TV. Android TV.
- Once you have it installed, launch the VPN application and then set the region to a USA server (Turn on the VPN).
- You’re done. Now you’ll be able to watch and stream anything you like.
There is however a minor problem since the US-specific content results will be made available to viewers. While the use of the VPN service isn’t the best choice if you’re looking to stream your preferred region-specific content, for the moment there’s nothing to worry about for us.
The final icing is that Google will shortly unveil its Google TV UI as well as the brand new Chromecast for other countries too (by the close of the year, it is expected). So, cheer up!

Set Google TV UI as Default Android TV Launcher
If you’d like to make the Google TV UI your default launcher for the Android TV then you’ll require the use of a computer and a USB cable, as well as some ADB commands to run.
- Navigate to the Settings menu on your Android TV.
- Select Internet and Network > Wi-Fi network. take note of the IP Address. You can change it to another that will be required in the following steps.
- Then, return to the Settings main menu and then go to Device Preferences > About Scroll down and then click the Build icon around 7 to 8 times in order to enable developer options for the Android TV.
- Go into the device preferences menu in the Settings menu.
- Here’s the newly activated Developer Options menu.
- Select the developer Options option to launch it. On it. The USB Debugging toggle as we do on the Android smartphones we use.
- Now, connect to your Windows/Mac/Linux machine then Install The ADB Fastboot Tools.
- After you have completed this, connect the following command on your PC to connect to your Android TV wirelessly following the launch of the Command Prompt as an administrator: (Make sure to replace the address text with the real IP Address you’ve recorded in the 2nd step)
- Then, a confirmation message will show up on the screen of your Android TV. You will be asked to allow USB debugging On your Android TV via your computer.
- Click on the checkbox that says ‘Always allow from this computer ‘ to allow it.
- Click OK to confirm your permission.
- When you’ve established that your Android TV has been connected to the Internet, you’ll be able to see the IP address connection result on the Command Prompt.
- For a quick check of the device, you connect to it is possible to run the following command if you need to (optional)
- A list of ADB devices with attached options that include a device ID at the command prompt on your personal computer. (If the device there is no connection, then try again in the second step, i.e. the IP address that you have noted down)
- We’ll suppose the Android TV is connected wirelessly to your PC. Then, you can run the following command on your computer’s Command Prompt in order to delete your standard Android TV launcher on the Android TV: (Ensure that you’ve installed the Google TV GUI to your Android TV before you run this command)
- After installation, the Google TV UI will show on your Android TV home screen itself as a default launcher. If it’s not there then simply start the Android TV.
- It is also possible to press the home button of the Android TV remote in order to launch the default Google TV UI Setup Wizard (for the first time only).
- Complete this setup Wizard and follow the on-screen directions and you’ll be completed.
- If, however, you’re experiencing problems, and you’re in a situation where the Google TV Setup Wizard does not show up, you’ll get the option to choose “TV Home and then select Always to make it your default home screen application and then, you’ll be able to be presented with a Google TV Setup Wizard.
- Enjoy!
What if I Want to Go Back to Stock Launcher?
In the event that you aren’t happy with it with Google TV UI or you’re experiencing any lags or stutters and you want to switch back to the Android TV Launcher, then you can execute one command.
- Check that you’ve wirelessly connected your Android TV once more to your PC using Android TV’s IP address. That means you need to follow the steps you did by executing the IP address command on your computer.
- After you have re-established the wireless debugging of your Android TV using the computer, type this command into the Command Prompt of your computer and press Enter to execute:
- After that, you can restart the Android TV then you’ll be back to your Android TV Launcher. Android TV Launcher.
- In that case in that scenario, you should take the time to uninstall both the Google TV app and Google App for the Android TV application as well as the Home Screen Launcher for the Android TV application on the device you use for Android TV. In addition, you must remove both APK files from your File Manager application to free some space in your storage.